Pages

Thursday, October 17, 2013

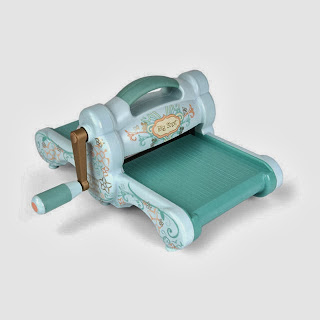
Die cut machine - big shot from Sizzix

After saving few months, finally I manage to buy my favourite Sizzix Big Shot machine! I fall in love with the colours when I first saw in website, and since it can be used for both emboss and die cut function, finally I decided to buy it via online.


What I like about this machine is it can die cut and emboss in 1 machine! I know there are few brands also offer the same function as big shot, but I just love it for no reason.

Of course it is not cheap as US / UK, and I've survey for so long and finally I decided to buy via aifel.com, which the facilitator just so kind and helpful with all her customer. You may check the address here --> http://aifel.com/ocart/index.php?route=product/category&path=24_151#container


This is the first card I made using the die cut machine. The check strip is the emboss effect and the picture is die cut with Sizzix Framelits Circles scallop dies set.


You may notice that these 3 item have the same image/ picture, this is the free printable image that provided by Angie Bloom from Unity Stamp. We actually having a contest using this picture, this is fabulous.


This card specially made for my best buddy birthday, this girl just so sweet. Guess what, I got it free when I purchased this magazine. So blessed!
Together with the same mag, these are the free gifts attached.


I'm just fall in love with this 3 little pretty girls, and I decide to make another card for my colleague in Singapore, just to drop by and say Hi to her.

 It's so sweet right?

Ok, I'm done with my current post. Will post again in the coming few days.


Emboss powder

For this post, I'm going to show some cards/ design using emboss powder.


First, just to introduce what kind of material that I used to create above card. From the first picture, there are Doily stamp from Hero Arts, white color emboss powder, and VersaMark watermark stamp pad. 

To begin, you have to stamp the doily with VersaMark stamp pad, and u stamp on a colour card stock or paper. Then, you have to pour the white colour emboss powder on top of the pattern before it dries out. After this, you may shrink out the excess powder, and used the heat gun/tool to heat up the powder. You can see the powder change the color slowly, and just a hint to you that you might not place the heat tool directly to one spot on your image, the result might not as what you will see as above. You have to move your heat tool around your pattern, and leave it for few seconds before it's too hot. When the powder started to change color, the emboss is complete. 


This is another card I'm doing with emboss powder. This round, I'm using the color stamp pad with transparent emboss powder. The steps of doing the emboss effect is same as above, and it's very nice if you have plenty of colour stamp pad and would like to have emboss effect on certain images. Do take note that the result might not as what you see if you used the fast dry ink pad. The idea for emboss powder is mean for ink pad that dry out slowly.


Here is another tag that I do using the emboss powder and distress stain, adding some blings, it look gorgeous.

So, why don't you start to make one for yourself today?

Tuesday, October 8, 2013

Cards for others

After few cards trying, I'm interest on using the distress stain to create some background effect. I have learn some technic from this YouTube video, you may check this out. 


 With the technic I've learn, I've create this card, for my new colleague with Everything Wonderful Sentiment Kit and Insightful Meadows kit from Unity stamp.


With this Wonderful sentiments, do hope that she will feel wonderful in everything.

In the mid of June, one of my colleague is celebrating her birthday, with the stamp I have, I've created this card using More Blessed to Give by Phyllis Harris from Unity Stamp. I just love this kit with the sentiment- It's more blessed to give than to receive! 


Well, I just can't help to fall in love to do cards for my friends... I addicted to read articles from others about create cards, and I start to get inspirations from Pinterest and blogger for ideas. I have created cards for my girls, using different stamps from Unity Stamp. 


After these, I have try with my first mini album for a baby full moon. It's not as easy as I thought, and I've spend weeks to finish it.


That's all for current post, will introduce the new machine in coming post!

My journey begins here

Well, this is my first post to start on my journey with scrapping world. I've started my scrapping journey in May this year, and I know that I will have a long way to go. Thanks to Angeline, who inspired me a lot to move into scrapping world and I'm so amazed with each of her art work, it's just too fabulous to me!

Will try to post up some cards and layout that I've made through these few months, and I guess I will elaborate more in my coming post..

This is my very first card that I've try with my first stamp from Prima Marketing, the beautiful doll stamp is design by Julie Nutting and it just look so pretty by itself. This also the first time I try out with distress marker from Tim Holz, and the sentiment is from Moment By Moment from Unity Stamp. She just look elegant and great.

This is my second card using the Moment by Moment kit from Unity Stamp. I decorates my card with some buttons and ribbons, and the reason I created this card just because it is in conjunction with my company 10 years anniversary, and the tag for this year is MOMENTS!


This is my first layout trying. Since I do not have much embellishments, I try to used a lot of flowers to create some layers and effect. I guess I have to try harder next time.

I just love this stamp a lot. It's Every Breath by Phyllis Harris from Unity Stamp. Making this card for my colleague birthday.


These are my earliest stages of my scrapping journey, will share more in the coming post tomorrow.